|
Instruction Guide |
|
The following is a basic guide to our instructions, explaining their layout, iconography and organization. We believe them to already be simple and self-explanatory, but hopefully this information will make them even more clear in case you have any questions. | |
| The PLI (Parts List) | |
|
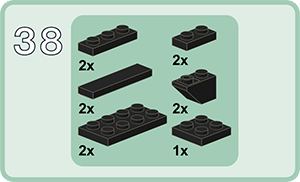
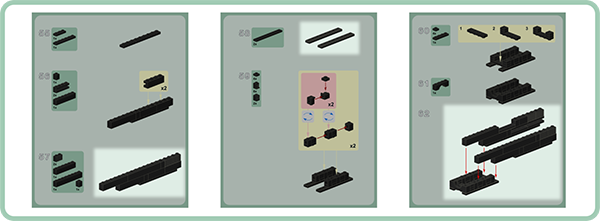
The PLI is displayed in the upper left of each step, directly next to the step number, and it shows every part you will need to use to complete said step. Gather all the parts shown in the PLI before you place any of them on the model. This will ensure you didnt miss using any parts as there should be nothing remaining from the PLI once the step is completed. |
|
Callouts |
|
|
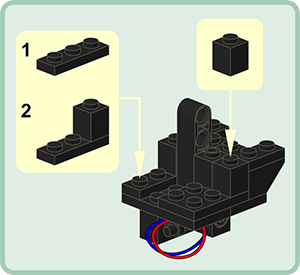
Callouts are small sections, built separately, which are then attached to the main model. They are highlighted in yellow with pointers showing where the sub-model attaches. Callouts show the sub-model oriented exactly as it is attached on the main model, unless otherwise noted. (see Flip Arrows below) |
|
Insets |
|
|
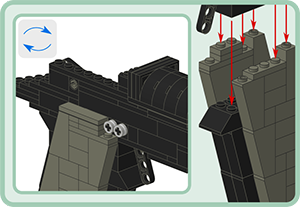
Insets generally are used to convey additional information about a section of the model. They will often show the current step from a different angle to clarify how pieces are attached. |
|
Flip Arrows |
|
|
|
|
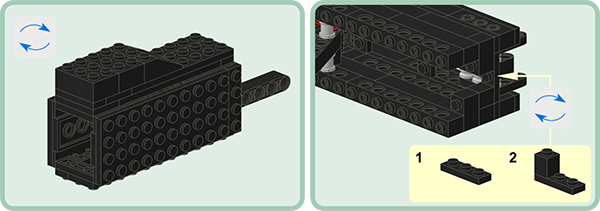
Often you will see a gray square icon containing two circular blue arrows. We refer to these as flip arrows. If they are isolated near the model it means to rotate the entire structure from the previous step so that it is oriented as shown. If the flip arrows lie on top of an arrow coming from a sub-model callout, it means you must rotate the sub-model to a different orientation before attaching it to the main model. |
|
|
Sudden Model Changes |
|
|
|
| If the model changes suddenly from one step to the next, this indicates you are starting a new section. Simply set aside your work up to that point as it will be used in a moment. | |
|
Rubber Band Sizes |
|
|
|
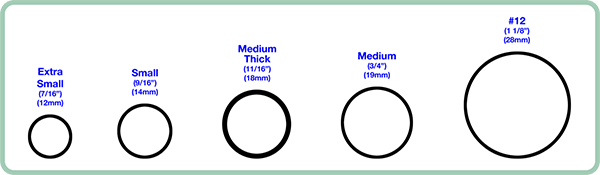
| Above are the rubber band sizes you will need to complete our models. Rubber bands are used to actuate mechanical movements such as triggers, hammers, slides, etc. so using the correct size ensures the correct tension and that things will move as expected. All necessary rubber bands (and a few replacements) are included with every kit purchase. | |
|
Rubber Band Colors |
|
|
|
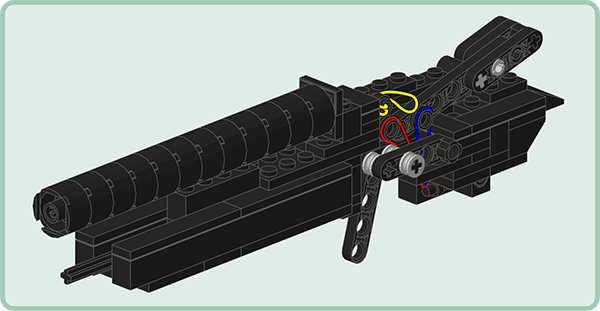
| Rubber bands will be shown in various colors throughout our instructions. These colors are merely for clarifying which rubber band is which and how they are attached. The actual color of the rubber bands you use is not important as they will all be hidden inside the model once it is complete. | |
|
Mind the Details |
|

|
|
| Perhaps the most important tip of all... Certain pieces have ridges, grooves or other details which are often important. Always pay close attention to ensure that you are orienting these pieces exactly as they are shown in the instructions. This will guarantee that your finished model looks and functions as expected. | |